Editing a Learning Object in the CMS
Target Audience: Teachers and Administrators with CMS Training
For programs with editing needs that go beyond what can be accomplished in the Learning Management System (LMS), specialized training is available for the Content Management System (CMS). As a best practice, CMS access should be limited to a select group of qualified individuals—such as curriculum specialists or instructional leaders—who are directly involved in content decisions and course-level editing.
To edit a learning object in the CMS, begin by duplicating the applicable lesson in the LMS and locate the learning object ID. Then, login to the CMS to clone the learning object. Now true editing can begin! This article covers reordering pages, adding pages, deleting pages, modifying text, and adding/deleting/replacing images in the CMS.
Note: For information on duplicating a lesson, locating the guid ID, or cloning a lesson, please see the related articles linked at the end of this article.
Editing Learning Object Attributes
After cloning a learning object, the first edits will be made in the Learning Object Attributes area.
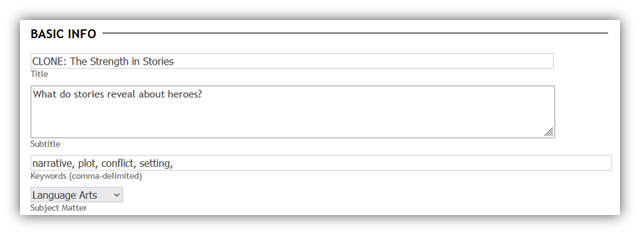
Basic Info
In the Basic Info area, notice that the word CLONE appears in the title. Delete this, or CLONE will appear in the title of the lesson in your course. If desired, edit the Subtitle here as well. Do not change the other attributes.
Objectives
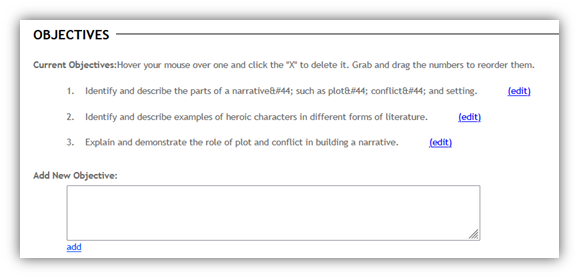
The next field holds the Objectives for the lesson.
- Existing objectives can be edited if desired. Select the edit button in blue, make desired changes, and select Save Objective.
- New objectives can be added if desired. Type the new objective in the Add New Objective and select add when finished.
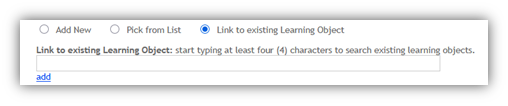
Skills Needed
The skills needed for this lesson are listed here. New skills can be added, if desired.
- Add New – Select the radio button and type the new skill in the box. Select add when done.
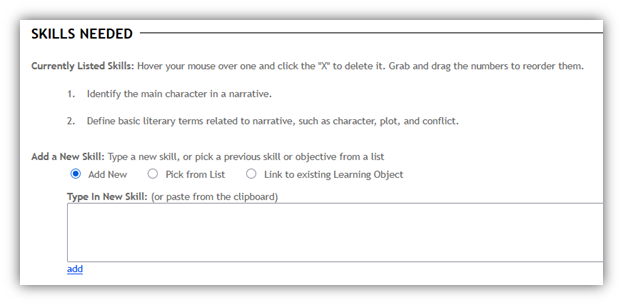
- Pick from List – Select the radio button to see directions for this option. Select add when done.

- Link to existing Learning Object – Select the radio button to see directions for this option. Select add when done.
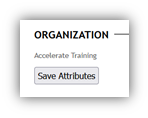
Do not change any of the other attributes below the Skills Needed area. However, you must save your changes by selecting Save Attributes below the Organization field or your work will not be saved.
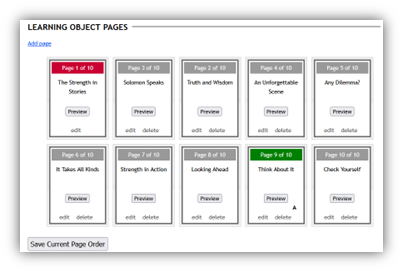
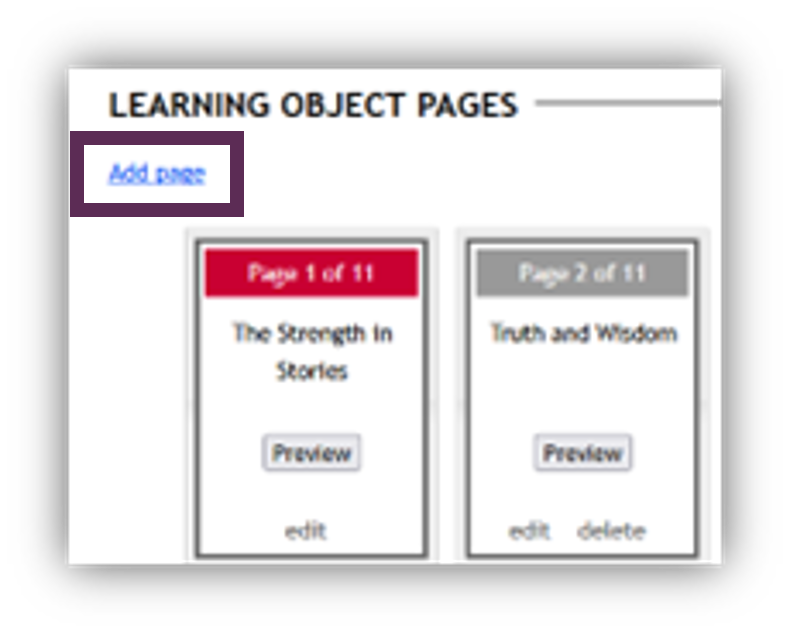
Learning Object Pages
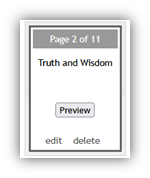
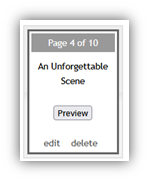
Below the Save Attributes button is the Learning Object Pages field. In this area, editors can reorder the lesson pages, preview lesson pages, add lesson pages, edit lesson pages, and delete lesson pages. Notice each page in the lesson is here, each with its own page number and title. Pages can only be edited one at a time. Depending on the types of edits made, these titles may need to be edited as well. Each edit type is described next.
Reordering Lesson Pages
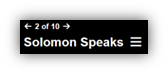
Click the gray page number box, then drag the desired page and drop it in its new location. Select Save Current Page Order when finished. Notice that the page number does not automatically update in the Learning Attributes field. If you select Preview, you will see that the page numbers do update in the lesson itself.
Adding Lesson Pages
Often, programs need to add pages to various lesson to meet local and state curriculum requirements. To add a page:
- Select Add page, located above the individual learning object pages.
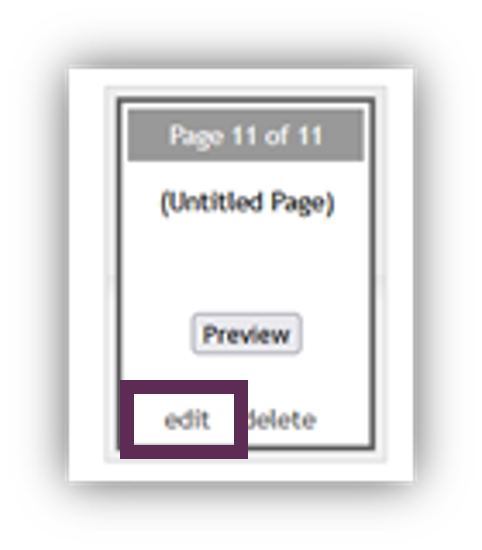
- The new page will be added to the end of the existing pages. If this is not the desired location, drag and drop it to where it should be placed. Be sure to select Save Current Page Order.
- Select Edit in the Untitled Page.
- Complete the desired Page Attributes, taking care to match these as closely as possible to the other pages in the lesson. A unique title is required for the new page. Other items to decide include: Subtitle, Page Type (Content, Authentic Assessment, Discussion, Journal, Honors, and more), Authentic Assessment Points (if applicable), Others
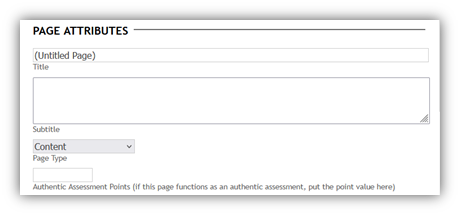
- Select Save Attributes when finished with Page Attributes.
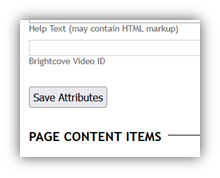
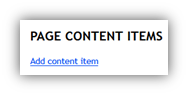
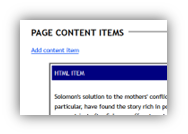
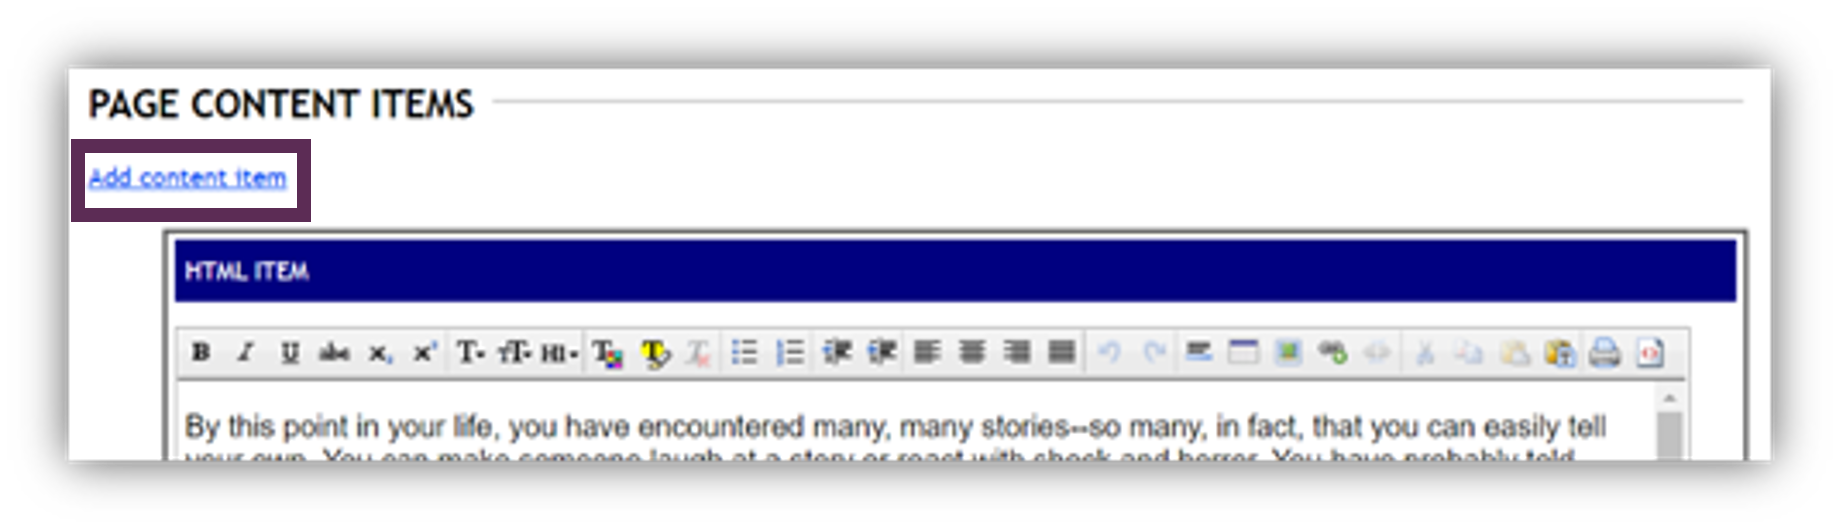
- Create the desired Page Content Items next.
- Select Add content item.
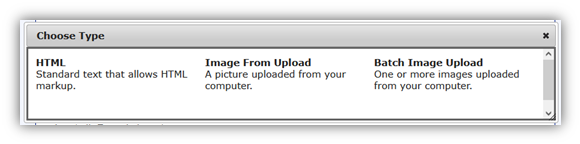
- Choose the type of content to create from the pop-up box. Choices include HTML, Image From Upload, and Batch Image Upload. In most cases, begin with HTML. Images can be added to the content after the HTML is created.
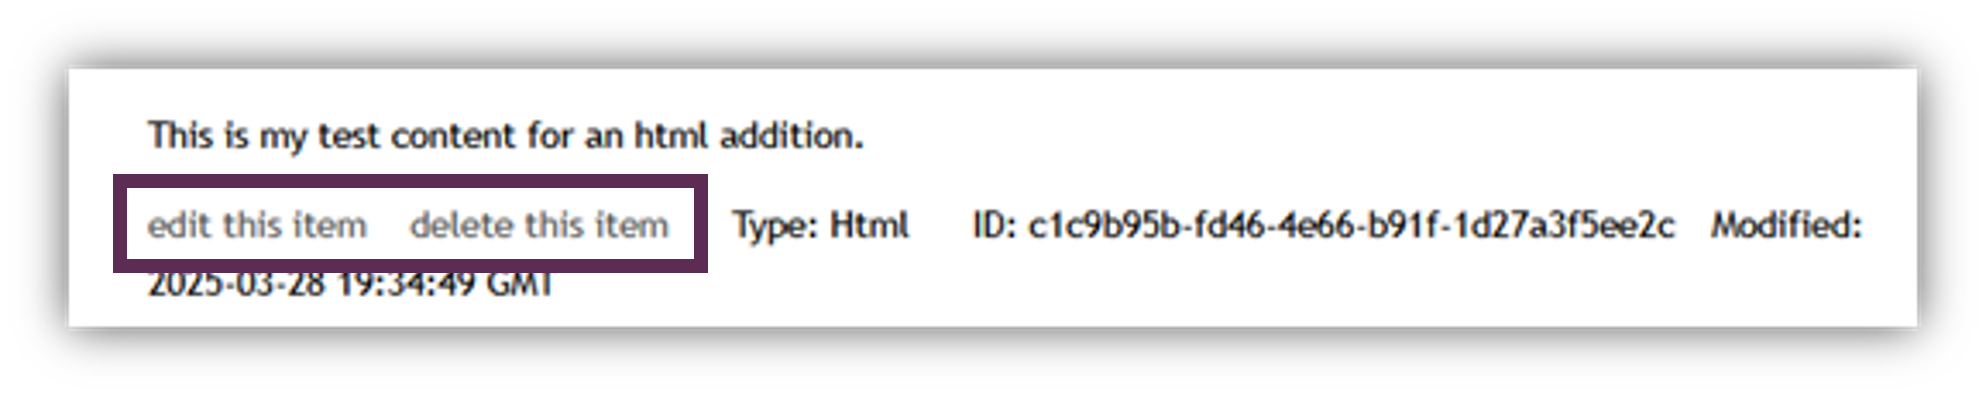
- Select Save when finished with any of these additions.
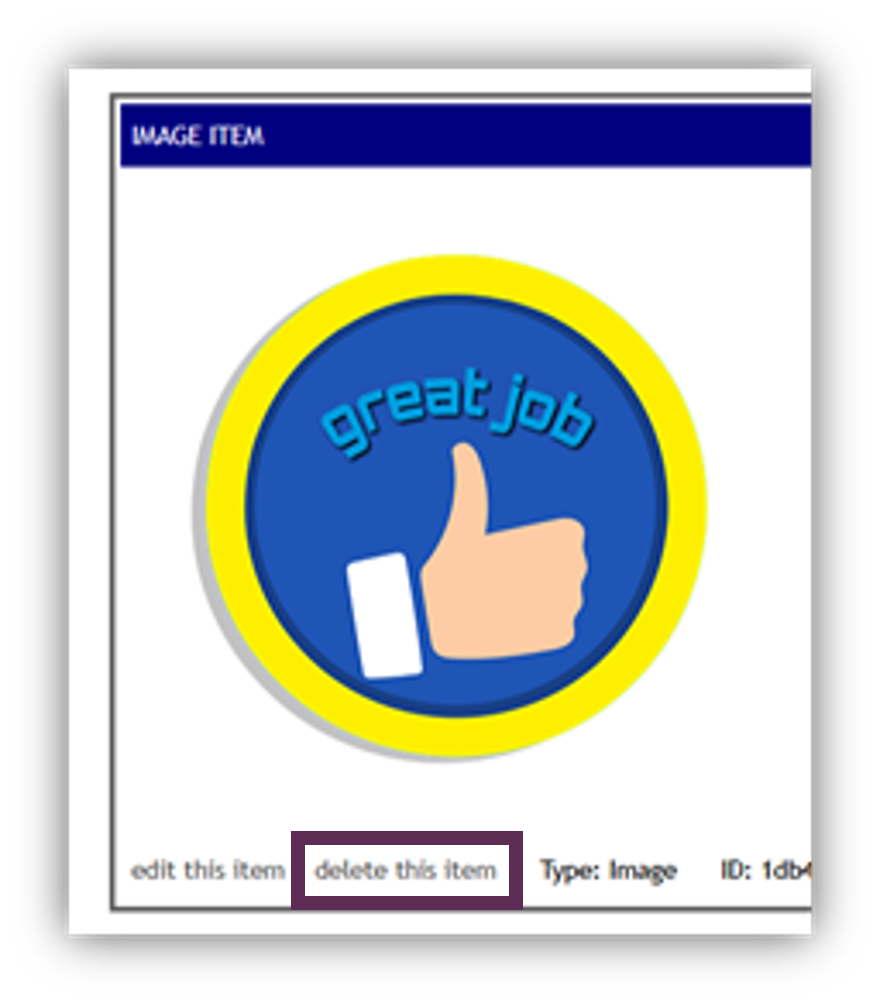
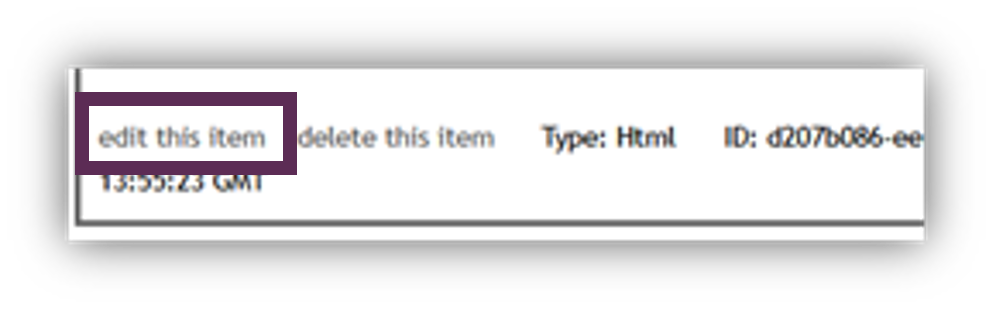
- Notice the options below the new content to use as needed: edit this item and delete this item.
- Preview if desired and select “Click here” at the top of the page when finished creating this new page to return to the original Learning Object.

Deleting Lesson Pages
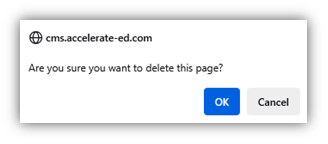
To delete a page, select the “delete” button on the desired learning object page. A warning will appear; verify the deletion by selecting OK.
Modifying Lesson Text
Programs may wish to modify text for a variety of reasons. Perhaps they need to add some wording to make the directions clearer for the students, or maybe they need to delete some directions when an assignment has been hidden. To do this in the CMS:
- Select the edit button for the desired page in the Learning Object Pages area.
- Scroll to Page Content Items.
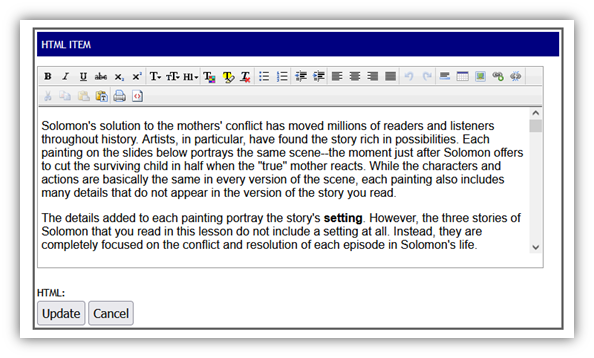
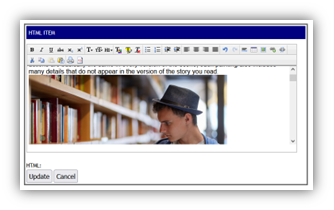
- Select “edit this item” at the bottom of the html content window.
- The editing tool bar now appears in the html window. Here, alter any text on the screen as desired by placing the cursor where you wish to add, delete, or edit the text, and make your changes.
- Select Update when finished.
Adding, Deleting, Replacing Images in a Lesson
Some programs wish to add program-specific images to Accelerate Education courses, replace an existing image with another of their choice, or delete an image entirely. To add, delete, or replace an image in the CMS, it’s important to note that an image can’t be uploaded or copied and pasted into the HTML Item window. Adding an image requires that the image source has its own URL. There are two ways to find the image URL.
- Use an existing image from an Accelerate Education course. This ensures that the image is appropriately sized, has alt text, and the URL is already there in the course. To do this:
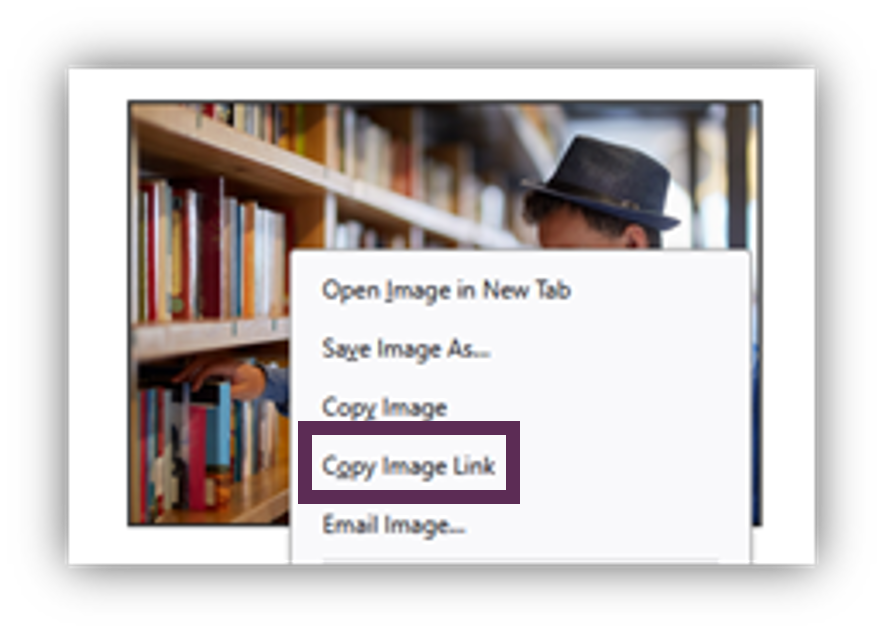
- Locate the desired image in the course.
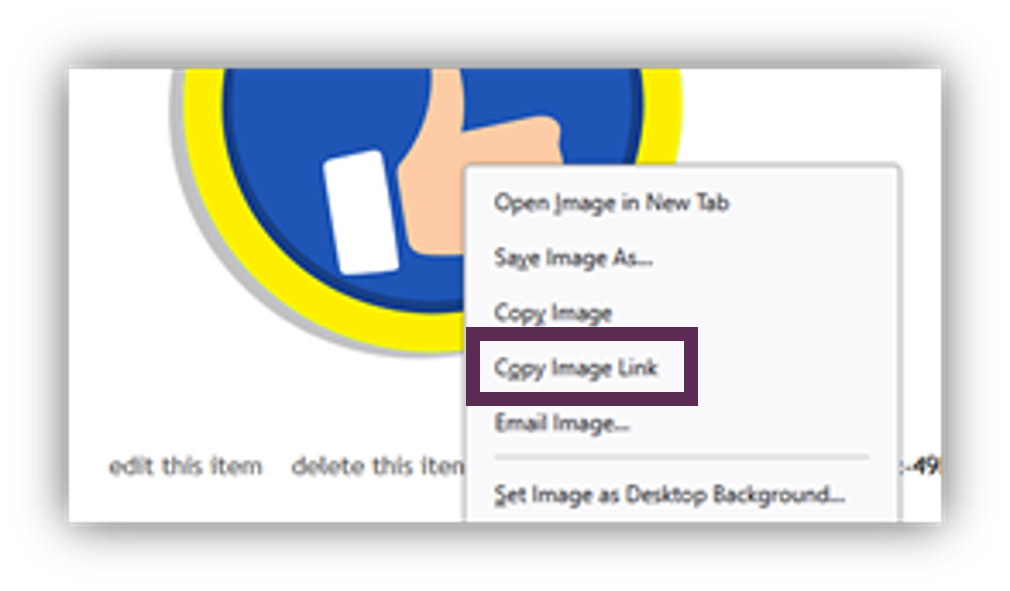
- Right click on the image.
- Select “Copy Image Link” from the menu that appears (this wording may vary depending on the program and hardware).
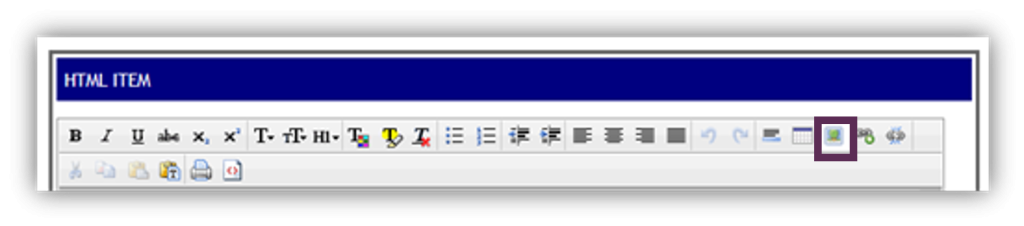
- Select edit this item from the bottom of the HTML Item field.
- Place your cursor where you want the new image to appear on the page.
- Select the Image icon from the html tool bar.
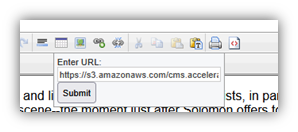
- Paste the image URL you copied from the course. Note: The https:// characters are already in this field. Since they are likely also in the URL you copied, you will want to delete these. Otherwise, you will get an error message.
- Select Submit.
- Verify the image is located where desired.
- Select Update.
2. Upload an image from your computer following these steps:
- Resize the image as needed prior to uploading.
- Select Add content item above the HTML editor.
- Select Image From Upload from the window that opens.
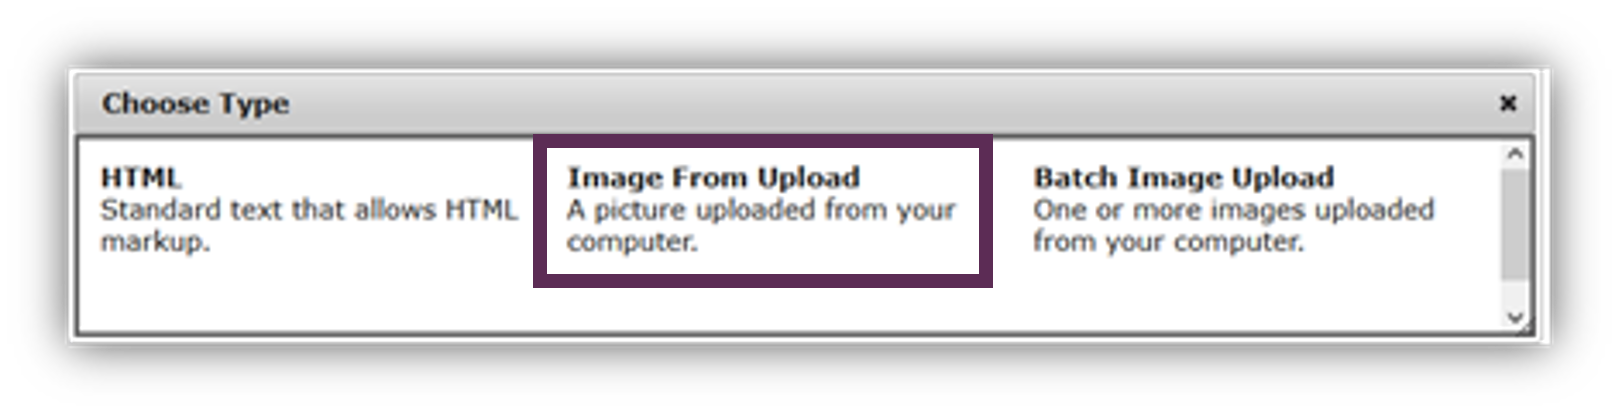
- Choose Browse to locate the image on your computer. Include Alt Text for accessibility.
- Select Upload.

- Your new image will appear in a new field, Image Item, located below the HTML Item field. You will get the image URL from this space. Right click on the image.
- Select Copy Image Link.
From here, the rest of the steps will be the same as adding an image from an existing course.
- Select edit this item from the bottom of the HTML Item field.
- Place your cursor where you want the new image to appear on the page.
- Select the Image icon from the html tool bar.
- Paste the image URL you copied from the course. Note: The https:// characters are already in this field. Since they are likely also in the URL you copied, you will want to delete these. Otherwise, you will get an error message.
- Select Submit.

- Verify the image is located where desired.
- Select Update.

Almost done! Scroll to the Image Item area again and select Delete to remove the extra item from your page.