Creating Courses
Target Audience: Administrators (Buzz)

After your initial administrator training, Accelerate Education staff loads your program’s initial courses. Follow the steps below to create additional courses as needed.
1. Review Your Catalog Access
Before creating courses, review your school contract to confirm which courses are available to you.
Catalog options:
- Personal Learning Catalog: Includes all Basic courses, as well as adaptive and independent study versions of our credit recovery courses.
- Standard Catalog: Includes all Basic and Premium courses, including AP and Honors courses.
2. Access the Course Template
- Open the Course Creation Template link.
- Open the file in your preferred spreadsheet program (Excel, Google Sheets, etc.).
- Review the written directions located directly on the first tab of the template.
- Available courses are organized by type in the tabs at the bottom of the sheet.
3. Understand the Template Tabs

Standard Courses Tab
- Lists all core and elective base IDs.
- Courses are organized into four sections:
- K–5
- 6–8 Only
- 9–12 Only
- 6–12 Combined
AP and Honors Tabs
- Includes all AP and Honors courses.
- Available only to schools with access to the Standard Catalog.
Credit Recovery Tabs (Adaptive and IS)
- Available to schools with a Credit Recovery Seat License or Personalized Learning License.
- Adaptive version: Students can test out of lessons and associated quizzes.
- Independent Study version: Students complete all lessons and assessments. Some courses are only available in this format.
4. Prepare the Template for Import
- Navigate to the appropriate tab (Standard, AP/Honors, or Credit Recovery).
- Copy the desired base IDs and course titles.
- Return to the first tab and paste the information.
- Add a teacher name or other identifying information to distinguish course sections.
5. Configure Course Settings
- In cell B2, select either:
- Derivative (recommended): Receives future updates from Accelerate Education.
- Static: Does not receive updates.
- In cell C2, enter either:
- Continuous — ongoing course access.
- Range — limited by start and end dates.
- Copy the data from cells A2, B2, and C2 down through all listed courses.
- (Optional) Enter a school-specific term in Column F.
- When finished, copy all information, including the header row.

Tip: Selecting Derivative is recommended, as static copies do not receive updates from Accelerate Education.
6. Import Courses in Buzz
- Log in to Buzz and navigate to the domain or subdomain where you want to create courses.
- Select the hamburger menu in the upper left corner and choose Courses.
- Open the ellipsis menu (⋮) and select Import.
- Paste the copied data into the import window.
- Select Validate Data.
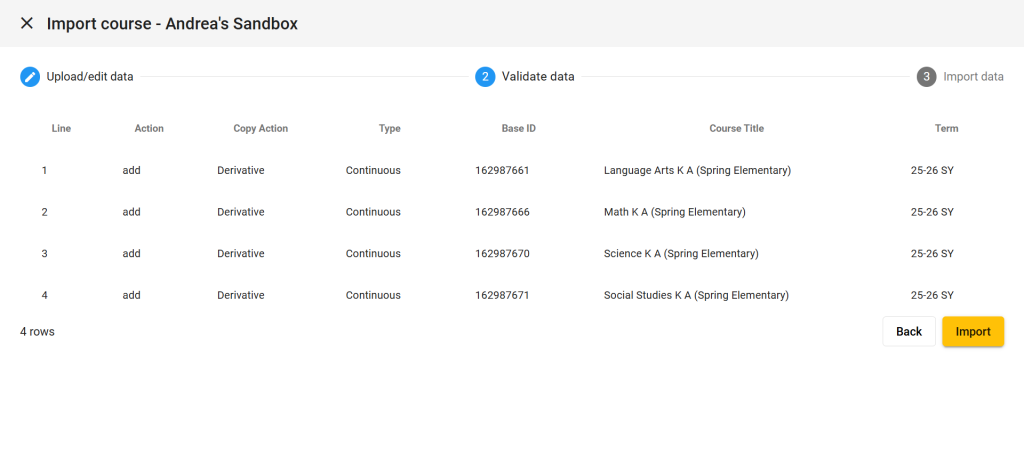
Warning: Check for any error messages in the bottom-left corner before continuing. Stop and correct any errors, ensure the header row is included, and verify you are importing into the correct domain or subdomain.
7. Validate and Complete Import
- If no errors appear, select Import Data, then Done.
8. Confirm Course Creation
Return to the Courses page in Buzz. You should now see all newly created courses listed and ready for teacher assignment or configuration.
Note: Always double-check your catalog access and import location before creating new courses to avoid duplicate or misaligned course listings.