Create Users
Target Audience: Buzz Administrators

User Creation Directions:
- Complete all fields within the user creation template. Remember, if using Accelerate Education teachers, a student’s email and phone number must be included.

- Copy data (including the column titles in row 1) on the user creation template. Copied data remains on the system clipboard until pasted later.
- Log in to the domain » select the hamburger menu.

- Select Users.
- Select the 3-dot ellipsis menu » Import.
- Paste previously copied data into the blank space on the import screen.
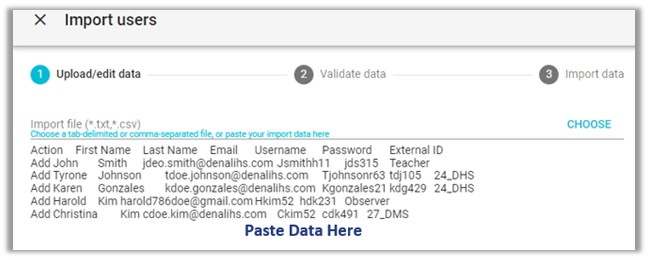
- Select Validate data.
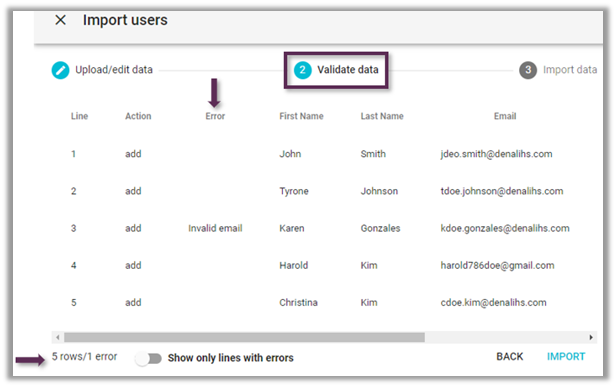
- Verify no errors occurred in the validation process. If errors occur, close the import process and correct the error(s) before continuing. Some of the most common mistakes include:
The user did not copy the first row of the template (column headers).
An extra space exists behind the email.
The user is trying to import from a view other than the Users view.
If no errors occur, continue. - Select Import data.

- Verify no errors occurred in the import process.
If any errors are visible, make a note of the error and correct those that did not process.
Re-import correct user fields. - Select Done if no errors occurred. Users now appear on the Users page.
- Organizational Tip (suggested): Return to the spreadsheet template. Cut all data in row 2 down and paste it into the Processed Users tab and add the Processed date in column A. Larger programs may wish to duplicate this tab to track users by school program, grade, or role.