Enrolling Users (Teachers and Students)
Target Audience: Buzz Administrators

Enrolling Student and Teacher Directions:
- Organize which students need which courses. The school’s SIS (school information system) often contains this information.
- Open your previously provided custom enrollment template (preferred) or this generic enrollment template. Please email training@accelerate.education and include your domain userspace or the URL where you log into your account if you would like to receive a custom enrollment template.
- Add the student usernames in column B.
- Navigate to tab 2 on the template labeled Enrollment ID’s.

- Copy the desired Course ID and course title from the custom tab, or, if using the generic enrollment template, follow the directions on the enrollment ID tab to populate the needed information.
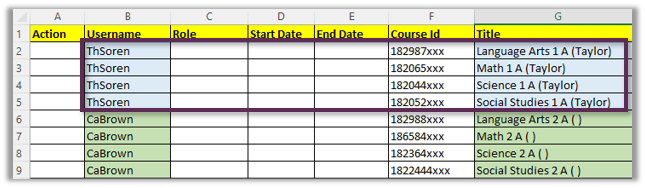
- Paste the information in columns F and G of the template tab. Repeat until all usernames and appropriate course associations are placed on the template. See efficiency tips below.If enrolling a few students, it is most efficient to place one student’s enrollment consecutively.
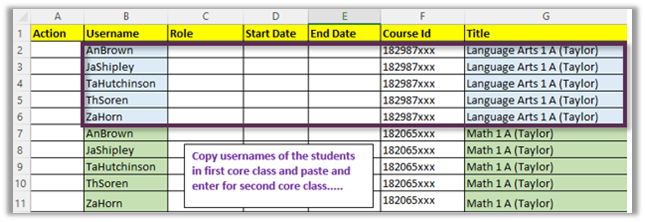
If many students enroll in the same core classes in a given grade level, it is most efficient to list them by class and repeat them for the next class.
- Enter the word Add in cell A2 and copy down through all rows with enrollments.
- Enter the role (student or teacher) in cell C2.
- Enter the desired start and end dates. Student dates must be accurate as they impact student pacing. Use the following date format: YYYY/MM/DD. Teachers need to have access prior to and after student enrollment dates.
- Copy data in cells C2 through E2 down through all enrollment data. Be sure to copy (not fill) so as not to increase the numerical date.
- Copy data (including the column titles in row 1) on the enrollment template.
- Navigate to the domain homepage/dashboard view. Do not try to import from the user or course view.
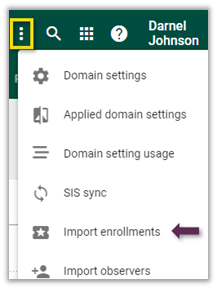
- Select the ellipsis menu (3-dots) » Import enrollments.
- Click in the large white area of the import view and paste data previously copied.
- Select Validate data tab » check for errors before continuing. Exit and correct mistakes if necessary and re-copy new data.
- Select Import data tab » check for errors.
If errors are because there is a duplicate, no action is needed. Sample error message: “username not found.” If this message appears, check on one of these two fixes:The import action takes place in the same domain as the user account.
The user account has been created. - Select Done.